 For reference, the naming conventions I am going to use..
Notes
Large floating bases, well seperated geographically make for a more sedate pace in this map. Because a ground assault is impractical, due to the restricted access that heavy armours have to the base, the vast majority of attacks come via fully laden HPCs escorted by scouts. AA fire is often vitally important on this map. The map suits larger teams and realisticaly at least eight members need to be on each side to make the map work. (Three defence, five offence.)
Central to the map is a missile tower that frequently ends up being the deciding point of the match - a point is gained for holding the tower at the end of the match. The tower is a useful, but not critical to hold, asset for most of the match.
Finally the very size of the bases and the tight corridors giving access to the flag or generators mean that assaults have a very tough time. Defenders have a healthy advantage here with the lighter armours suffering particularly inside the bases. Heavy armours tend to be the rule and careful use of a shield pack is highly advised.
For reference, the naming conventions I am going to use..
Defence - internal
 Entrance to the flag room.
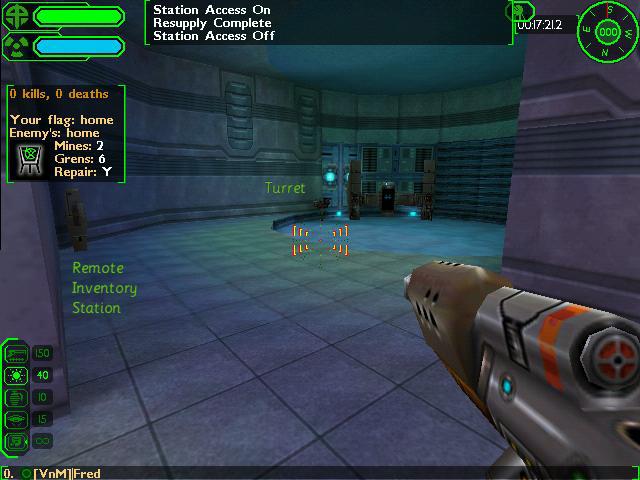 Inventory and Command station area.
Heavy near the flag at all times. Turrets, mines and a sensor jammer in the immediate flag area are a priority.
 no mines here, right...
 not on yer nelly!
Once that is secure start placing mines and turrets in the air shaft that leads to the flag room. This is a common attack route with enemies frequently rallying at the far end of the airshaft - with no base facilities nearby that room tends to be unoccupied allowing attackers a breathing space while they prepare for the flag push. Placing a mine directly on the lip of the airshaft makes a surprisingly hard to remove impediment for attackers. It is also worth dropping a mine down the segment of the shaft that leads to the main open area of the base. Some canny enemies will try an assault through here - generally after having just destroyed the vehicle pad.
Because of the confined spaces in the corridor turrets tend not to last terribly long, so place them as close to the flag end of the shaft as possible - laying some mines near the other end. That way the turrets get maximum firing time before they are destroyed. You can usually squeeze two turrets into this corridor - place them on opposite sides of the corridor so that they both have a relatively unobstructed line of fire down the corridor. Generally, standing with my back to the flag room end of the shaft, I place the lead turret on the left side of the shaft and the second turret on the right side.
As a last touch, for the sole flag defender, place a camera on the ceiling of the shaft and align it towards the far end of the shaft. If placed just behind on of the structural 'ribs' in the shaft it will just look over the edge when deployed and blends in surprisingly well - frequently enemies will never notice it. This serves two roles, firstly it allows the flag defender to check the shaft quickly and it places enemies onto the command map even if they use a sensor jammer to try and sneak in through the shaft. A second camera near the lift to the flag room can be similarly useful too.
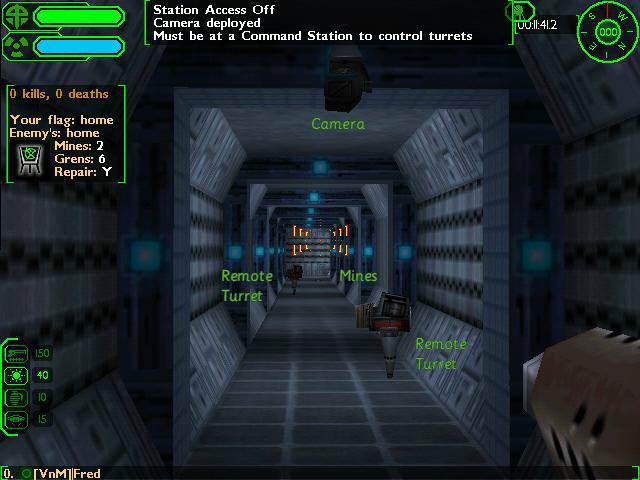 What the air shaft should look like.
If the man power is available stationing a patrolling heavy in the airshaft is worth doing, place an ammo station up just around the corner from the main length of the shaft and you have a quick resupply point for them. If they routinely lurk on the air shaft lip they can often drop mortars onto enemies that have just snuck into the base. If this is the case drop one of the turrets and place one in the corner at the flag room end of the main shaft run. That way the heavy defence can squeeze past it and you still have something that gives light armours a headache.
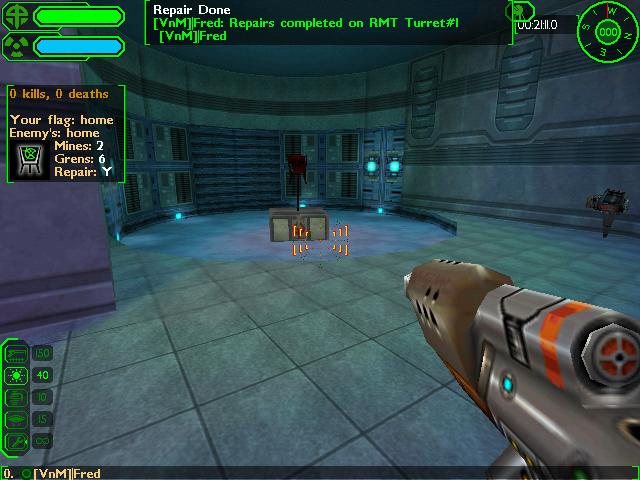
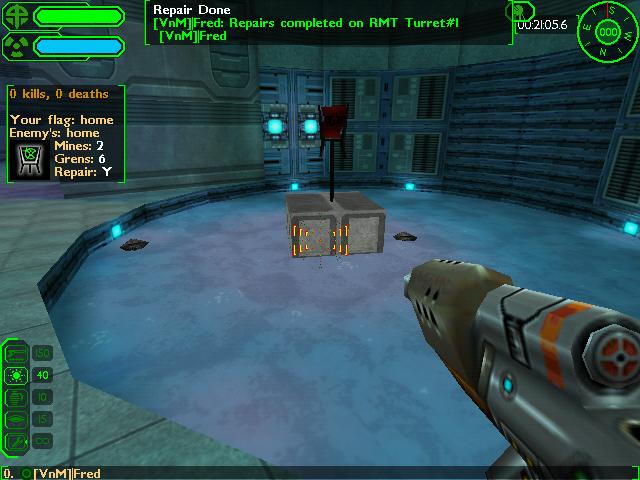
Similarly a heavy on generator defence. Place two turrets in the generator room itself and mine the floor around, but not next to, the generator. Frequently enemies will try to rush past the turrets and drop down to the generator room floor in a kamikaze style to try get the power down. Usually they are hurting when they do this and these mines will prove an excellent last line of defence. Two turrets in the room and a sensor jammer complete the work here. One turret on top of the pylon in the center of the room is often a good choice as it is harder to cause splash damage to that turret. (Not by much though.)
Outside the gen room place two turrets up the corridor near the lift end of the base - enemies sometimes drop down the lift shaft and sneak in this way. One facing the lift and the other on the inside corner of the corridor, from here it can fire down past the generator room entrance and shoot towards the lift area. Also drop a pulse sensor up here if you have the time. Now the key part - the segment of corridor leading to the main ledge of the base.
Place a camera up above the doorway entrance from the main ledge, on the exterior of the base. It blends in extremely well and in a lot of matches I have seen it never gets destroyed. Place it halfway up the wall of the base where people least expect it. Mine the ledge entrance as a first line of defence. Place a remote turret further back in the corridor - midway on the first long stretch leading to the generator room. Put a portable ammo station down near the corner of the corridor facing in such a way that a defender looking towards the ledge entrance end of this corridor can back into it for quick resupply. This station allows the defender to stay on station for extended periods with resupply. Standing here with the Mortar ready, using the camera to time your shots for when enemies enter the corridor, you can frequently get in the first shot.
Again, if the man power is available, place a second Heavy on patrol near the main ledge entrance with an ammo station near the end of the corridor. Their role becomes generator/main ledge defence. If under a concerted assault they can retreat back to the generator defender, resupply in the generator room and then aid in the defence. Finally a medium should patrol the base with a repair pack, provide backup fire support for trouble spots and resupply external defenders as required. If time permits they should set up three turrets in the main base inventory room, one on top of the crates is often a good spot. And deploy two turrets near the air pad entrance to help stop lighter armour types from trashing the pad too often.
Defence of the air pad is tricky at the best of times as scouts can kamikaze into the pad very easily. That and the wide open nature of it's entrance mean that a lot of repair time will be spent here.
Defence - external
If the man power is available one Heavy and a sniper-kitted-out light should stay on the roof and do AA defence. With extra manpower then midfield snipers can provide good air cover and have the mobility to deal with most threats. Because of the prevalence of aircraft in this map then most lights should carry disc/chaingun/laser combinations. Placing a sensor jammer on the base roof is worth doing to help slow down long range attacks on defenders.
Generally defence should be concentrated around the main base. But towards the end of the match then tower defence becomes important. Here getting some heavies in is important. A heavy in each doorway and two up the top make the tower a difficult assault. Make sure at least one person, most likely the pilot if these forces are APC lifted in, carries a repair pack to keep the tower ammo station and power plant operational.
Offence
Fully laden APCs are the order of the day. If six people are available for offence then taking two LPCs can be useful - more targets for the enemy base defence to shoot down. It is important to either destroy the APC if you don't want to use it again or ensure that the enemy doesn't steal it. Vehicle theft and the eventual vehicle starvation syndrome is a real problem on this map and can cripple any further assaults.
There are two primary targets for full assaults the main one being the flag with a strong secondary being the generators.
Offence - generator assault
A generator assault entails four heavies moving in via the ledge entrance, overwhelming the defences and then two setting up camp inside the enemy generator room. A secondary route is to come in via the Balcony, drop down the main lift shaft and hit the generator room from behind. This second route has the advantage that generally the defence crew is concentrating on the ledge entrance, so you can get surprise on your side.
The lead heavies should carry shield packs with one heavy carrying a repair pack the other a remote inventory station. Given that the corridor only permits two heavies to fire at a time then the inventory heavy should hold back a little behind the others and guard the rear. The repair pack equipped heavy should repair the lead heavies as much as possible while they attack (stay right behind and keep that pack chugging for as long as you can.) If any of the lead heavies go down, then they take up arms and continue to press the assault. It is important that the inventory station equipped heavy make it into the generator room. If they fall another team member should drop their pack and collect the station pack.
Once in the generator room, destroy the generator and notify your team that this has been completed. Place the inventory station inside one of the alcoves near the door and put two remote turrets up just inside the door. Mine the floor near the generator. If you are the sole unit remaining then hiding in one of these alcoves and letting the repair crew drop down to the generator can be a good idea - simply drop grenades or a mortar shell in after them. Preferrably keep two heavies on patrol outside the room with shield packs. Any surplus members can then choose to press on and begin clearing the flag defence by going up the lift shaft. Or they can go up to the roof and ensure that the balcony plasma turret and the solar panel are destroyed. This option should only be pursued if a second assault team is available and en-route.
If a second assault team is enroute, then the pilot should either destroy the HPC or bug out back to base with it to ferry the next team in. I'd favour destroying it and then being ready to act as a flag runner myself but if the second assault team is tasked with a flag assault then it probably is better to just bug out. If the vehicle is destroyed and a flag grab is impossible then the pilot can aid out with suppressing the solar panel and perhaps doing some station trashing.
Offence - flag assault
Three main entry routes are available 1) balcony and then air shaft, 2) balcony then small lift shaft to flag room or 3) vehicle pad entrance followed by either the air shaft or small lift shaft. Generally it isn't practical to enter via the generator room entrance as it merely increases your time spent in corridors which is when mobility is comprimised. It might be worth doing infrequently as a surprise maneuver in a light armour as it does bypass the balcony turret but only if the team holds their generator room. In which case it is much easier to destroy the solar panel and render the balcony turret non-functional, and thus safely passable, that way.
For a flag assault starting at the balcony then ideally a fully laden HPC with four heavies, two with shield packs, one with a jammer pack and one with a repair pack should be escorted in by a scout. One heavy carrying an ELF gun should then proceed to ELF the balcony turret while another plasma guns it. Both pilots should help provide support to the heavies. One light should carry an energy pack and be passed the flag once outside the base. Park the scout down either behind the base or to one side of it where it tends to be overlooked by defenders. The HPC should land on the roof. If possible destroy the HPC while the balcony turret is being dealt with.
Be wary of mines, most defenders will heavily mine the end room that the air shaft terminates in and frequently they will mine around the corners of the corridor leading to the main lift shaft. Shield packed heavies should lead the charge, flag runner trailing with at least one heavy bringing up the rear. Don't get too bunched up, especially the light - defenders will gun for the light armour recognising it as a flag runner. And even if they don't defenders will be keen to throw mortar shells at the attackers which a light armour cannot take.
If taking the air shaft two heavies should lead, then the interior flag runner and finally a heavy to bring up the rear. Leave one heavy to cover the exit - this heavy's brief is to ensure that exit is clear and that the balcony plasma turret stays down. The light with the energy pack should hide around the back of the base and wait for the flag to be pulled outside the base. Try and ensure you and your scout are not spotted, so no shooting at anyone unless absolutely neccesary. The leading heavies should bust in, demolish the flag defence and signal for the flag runner to come in. Once the flag has been grabbed one heavy should follow up the flag runners rear and cover it while traversing the air shaft. The interior flag runner needs to exercise some care while the, previously to the rear, heavy drops out of the air shaft and checks the coast is clear. If it is then make a break for it and get out to the exterior flag runner and transfer the flag. If you are it, make a break directly for the home base by whatever means available.
The above pretty much covers the corridor assault from the balcony as well. Here though the corridors are wider, making defence of the flag runner trickier. Tight co-ordination will be required. Also watch out for enemies popping out up the main lift shaft as you pass by. Murphy's law dictates that they will pop up at just the right time to get a clear shot at the flag runner. However one reward for passing this way is the presence of health patches and packs that can be used. Let the flag runner have priority with them and then the leading heavies get the residue.
An assault through the vehicle pad offers a lot less cover but has a certain amount of surprise factor to it. Once inside the main base enclosure you can choose to either use the air shaft or go in through the smaller lift shaft. Either way, form up again and let the shielded heavies lead. Generally only use this assault path if you know that the base is lightly populated - the main inventory station is in here along with a healthy percentage of spawn points making it very likely that you will be jumped by defenders.
Keep an eye on the team member death messages and remember what everyones role is. If the exterior flag runner dies, then chances are the scout will no longer be available - so plan on skiing back to base. If the rear guard goes down, consider exiting the base by another route. The flag runner has command discretion here. If the flag has been succesfully extracted then surviving members might consider holding the air shaft and flag room. If the interior flag runner is still alive then have them lurking near the flag room for an immediate capture attempt as soon as the flag returns. This is unlikely to work without a second team holding the generator room so a secondary goal is to continue on and take the generator room, trashing stations as you go. Either way tie up defenders for as long as possible and prevent them from refortifying the base.
One variant to the above is to replace one heavy with a medium for interior flag running. The extra durability of a medium with shield pack and the lack of mobility inside the base make it a good choice. If this is the assault loadout, then the HPC pilot should bug out immediately with the APC and return to base.
Repair Priorities
Flag defence
Generators [1]
Inventory stations
Vehicle pad & station
Turrets [2]
Pulse sensor
Mortar Turret
Solar Panel and Ammo stations
[1] In the event of a generator room breach, fix the solar panel instead of the generators. That way defenders can equip properly to remove the invaders from the generator room.
[2] generally the generator defence is expected to keep the indoor turret fixed by themselves. So the primarily refers to the balcony plasma turret.
Tips/Tricks
Observations
MX3 clan like to attack via the balcony with heavies and come down the main lift shaft towards the generator room.